Adventures with the Lily58 #3: Return of the M-key
In the last build log, I was stuck with three dead switches on the right side of the keyboard. Using my pliers and pulling hard, I extracted all three of them. For two of them, I saw the problem immediately. One of the two pins on the switches was bent. They were easily bent back into shape with pliers. Then, I re-inserted them into their hotswap sockets. They started working with no further complaints.
The third switch, the M key, was a tougher cookie. None of its pins were bent. However, its diode was a bit of a hack job when I installed it, so I assumed that was the problem. Since its leads broke off, I had just soldered it to the top side instead of pulling its leads through to the bottom side. First, I tried reflowing the solder to make sure the diode had a good connection. Nothing happened. I tried replacing the diode, which also didn’t work. I then reflowed the solder on the hotswap socket and tested the connections using the multimeter in connectivity mode, and all the connections looked good. Even stranger, when the keyboard first powered up, the left OLED reported that the M key had been pressed.
At this point, I was scratching my head and wondering if I had somehow gotten a bad PCB. Then, I saw that someone recommended testing the connections going back to the micro. Using the multimeter in connectivity mode, I found that on good switches, one side of the socket was connected to a single pin on the micro. The same was true for my bad switch, but upon looking at the pins on the micro more closely, I discovered the root of the problem.
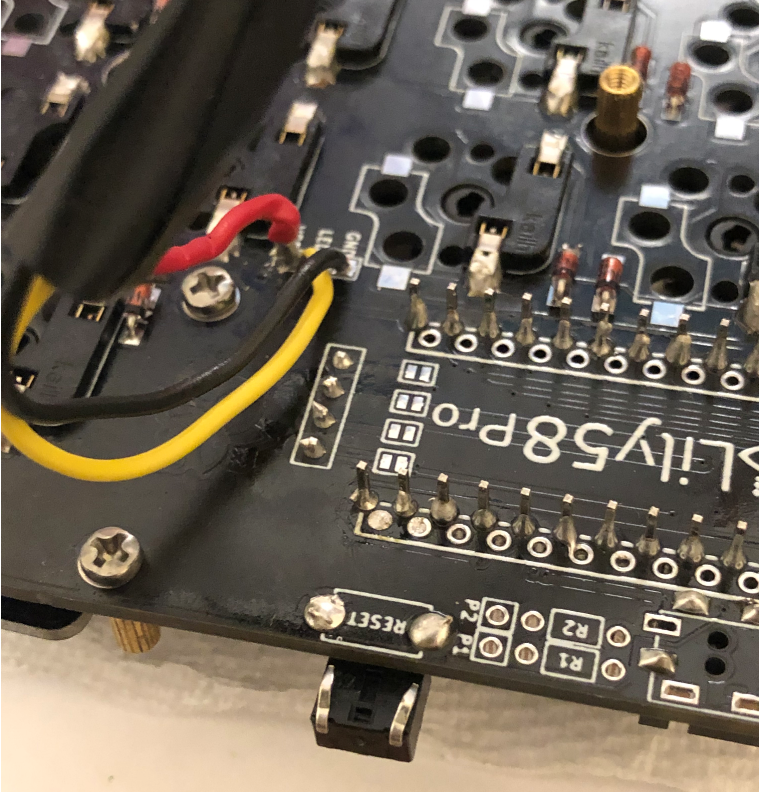
To allow the PCB to be reversible, there is an adjacent line of holes very close to where the micro’s pins go into the PCB. One of the pins looked like it had excess solder, perhaps enough to touch the adjacent hole.

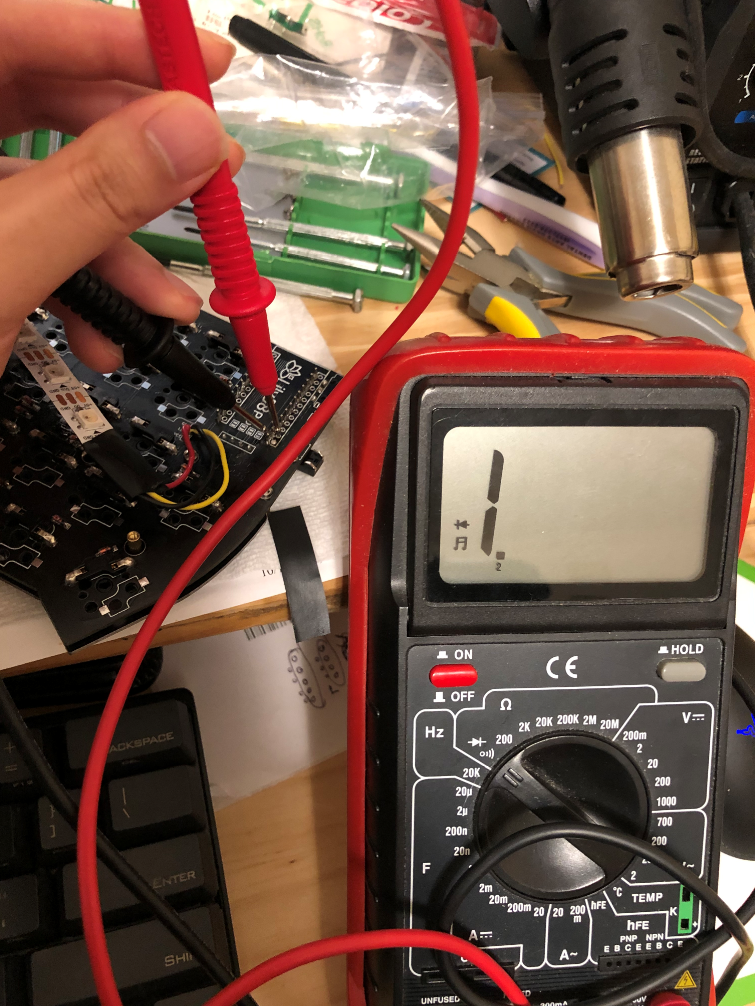
Upon using a multimeter, I discovered that this was indeed the case. A few swipes of the soldering iron broke the connection, and the key finally started working!

From there, it was just a matter of getting some saner keybindings. The Lily58’s default firmware has four pre-defined layers:
| Layer | Description |
|---|---|
QWERTY |
default layer |
LOWER |
custom layer entered by holding the LOWER thumb key on the left half of the keyboard |
RAISE |
custom layer entered by holding the RAISE thumb key on the right half of the keyboard |
ADJUST |
a layer with settings for RGB backlighting |
It’s hard enough adjusting to an ergo keyboard’s layout, so I went through a flurry of remappings:
- Swap
ShiftandCtrlon the left half of the keyboard - Turn the upper right key into backspace
- Add a key to invoke the
ADJUSTlayer (LED backlighting control) - Make the function keys for each half of the keyboard available on the corresponding number key, e.g.
1->F1,2->F2, etc. - Add volume up/down/mute keybindings on the
LOWERlayer - Add a keybinding for
Caps Lock - Add
Home/EndandPageUp/PageDownto the existing arrow key mappings in theRAISElayer on the right side of the keyboard. - Add WASD gaming-style arrow keys to the
LOWERlayer on the left side of the keyboard. - Add keybindings for
|,~, and`on the upper corners of theRAISE/LOWERlayers
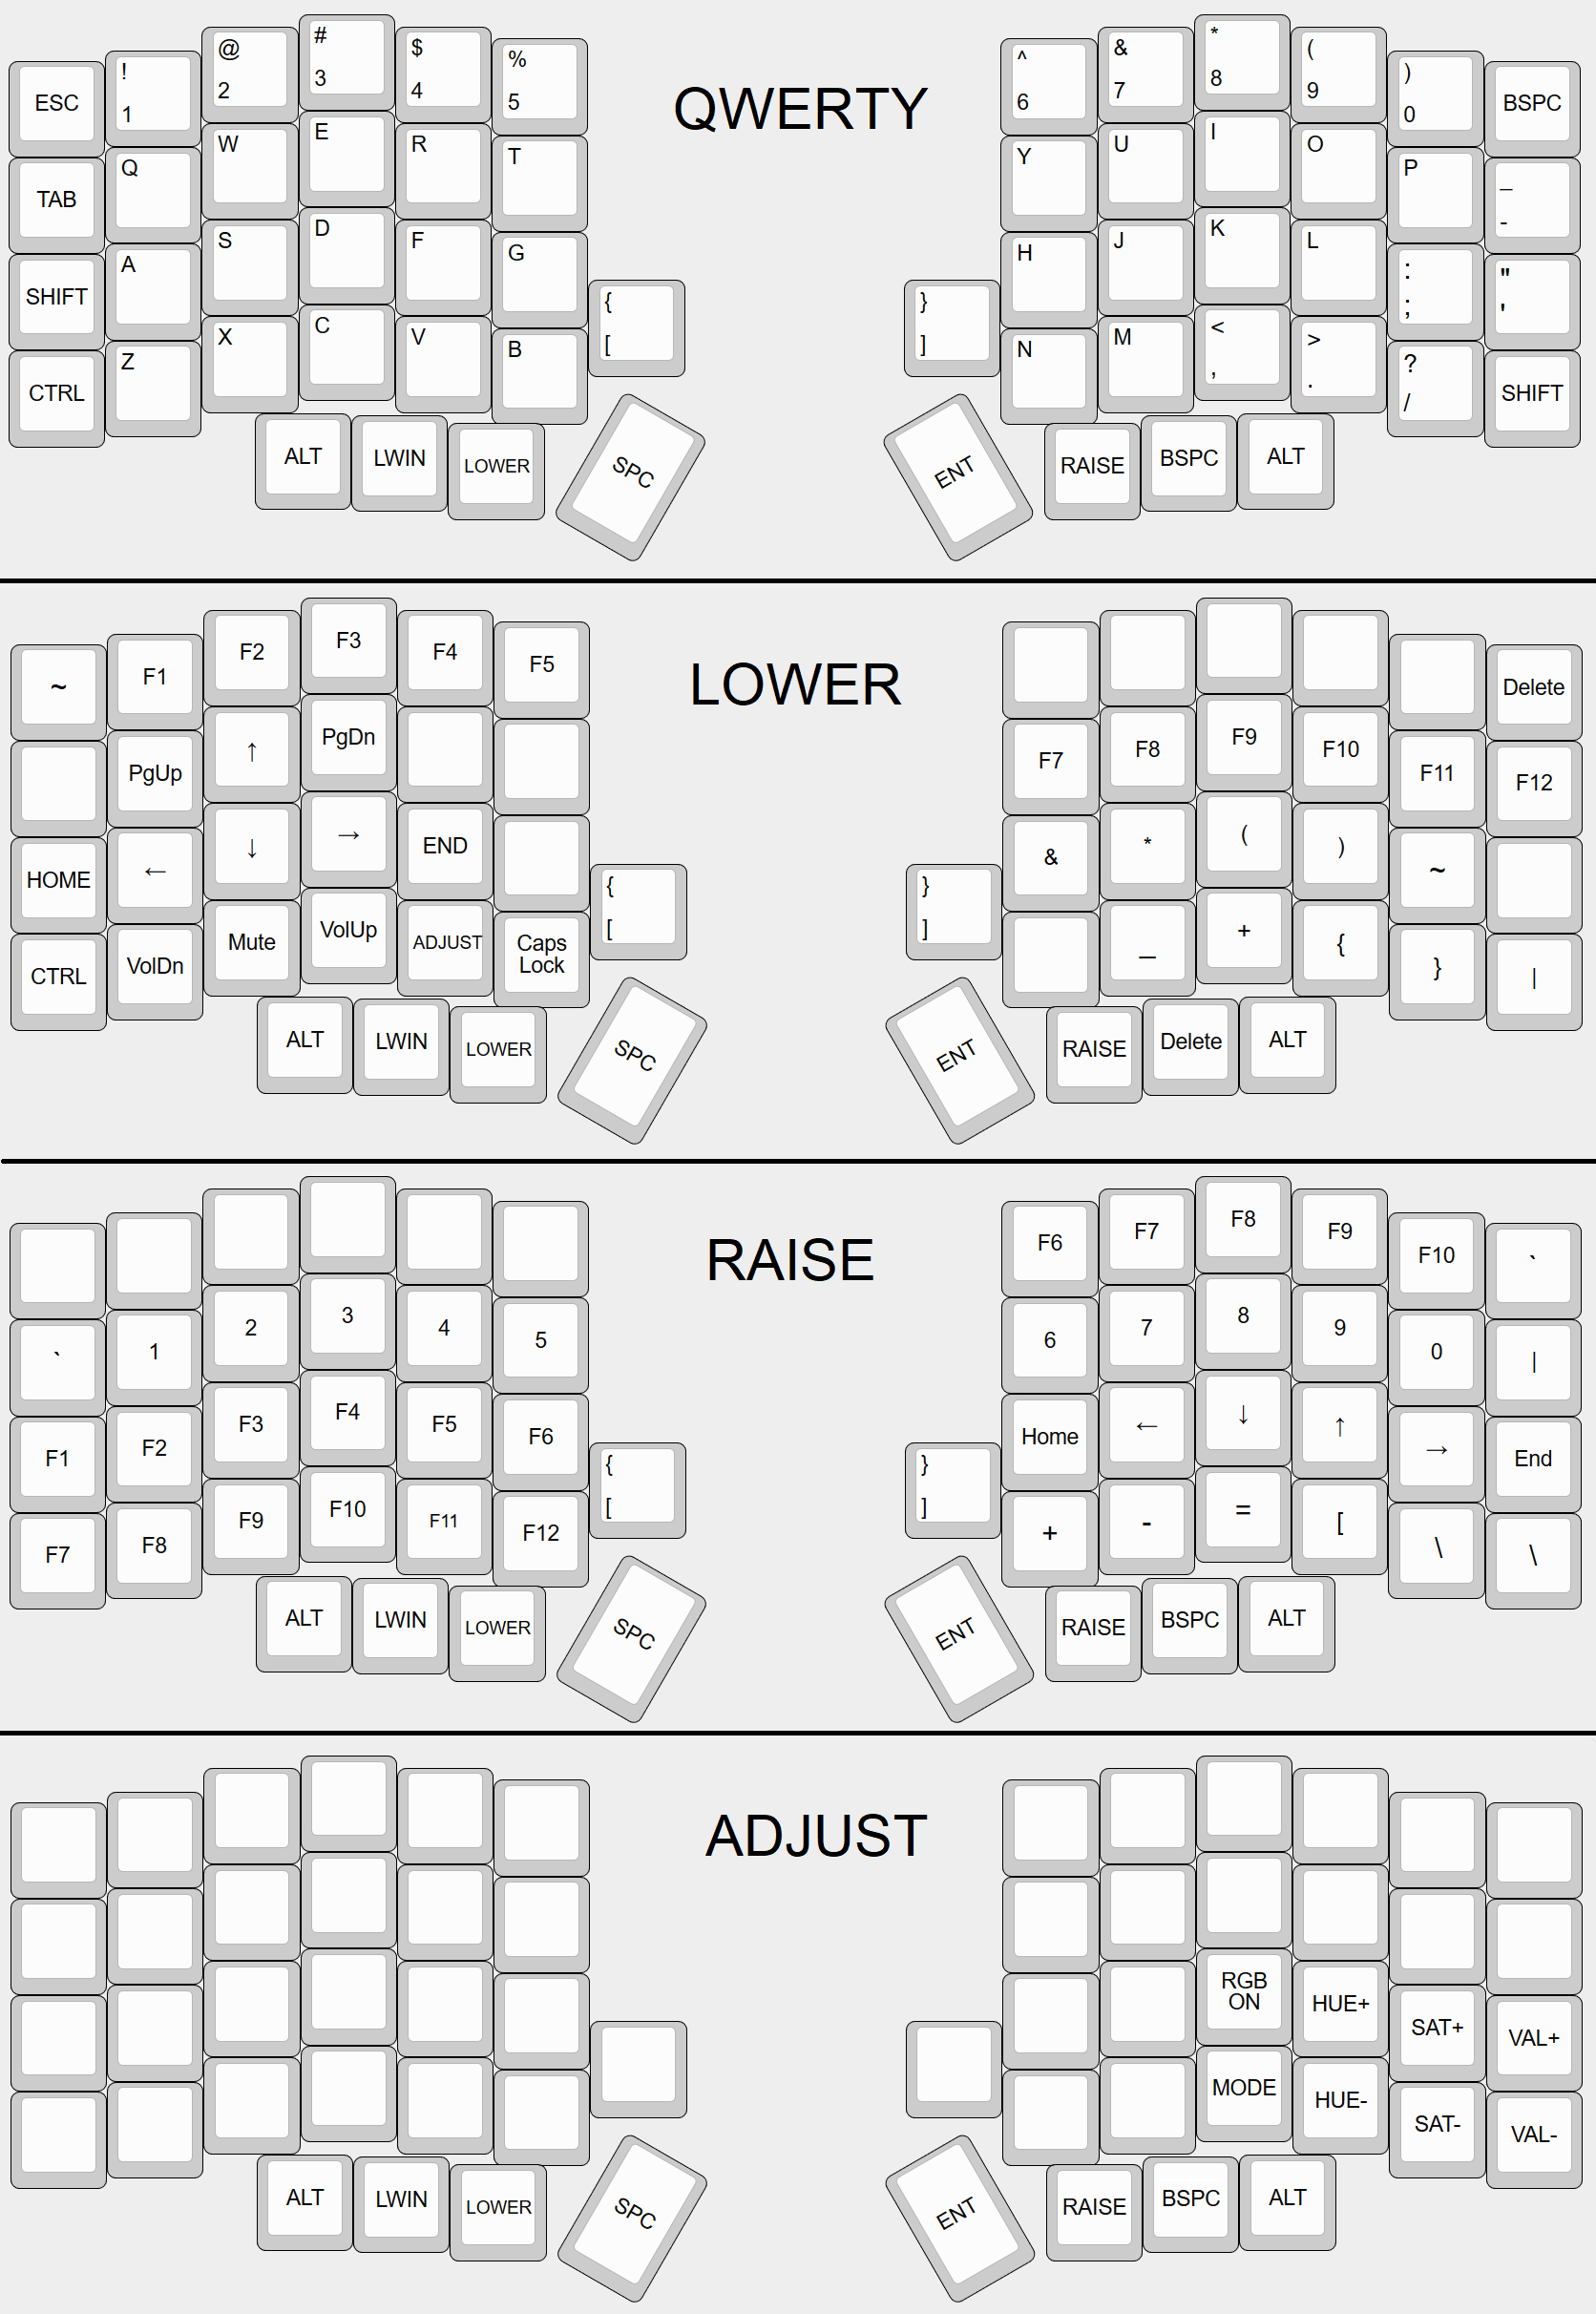
Here’s how it looked after the dust settled.

Even after the remappings, I was having trouble getting used to the keyboard layout. Normal keyboards shift the “qwertyuiop” and “zxcvbnm” rows left and right relative to the “asdfghjkl” row, but the Lily58’s rows are all non-staggered. It took a few weeks to get used to it.
Since the “Lily58” sounded insufficiently awesome for a keyboard of this class, I decided to christen it the “BOUNTY HUNTER 58”, and I edited the graphic in Paint to reflect this.

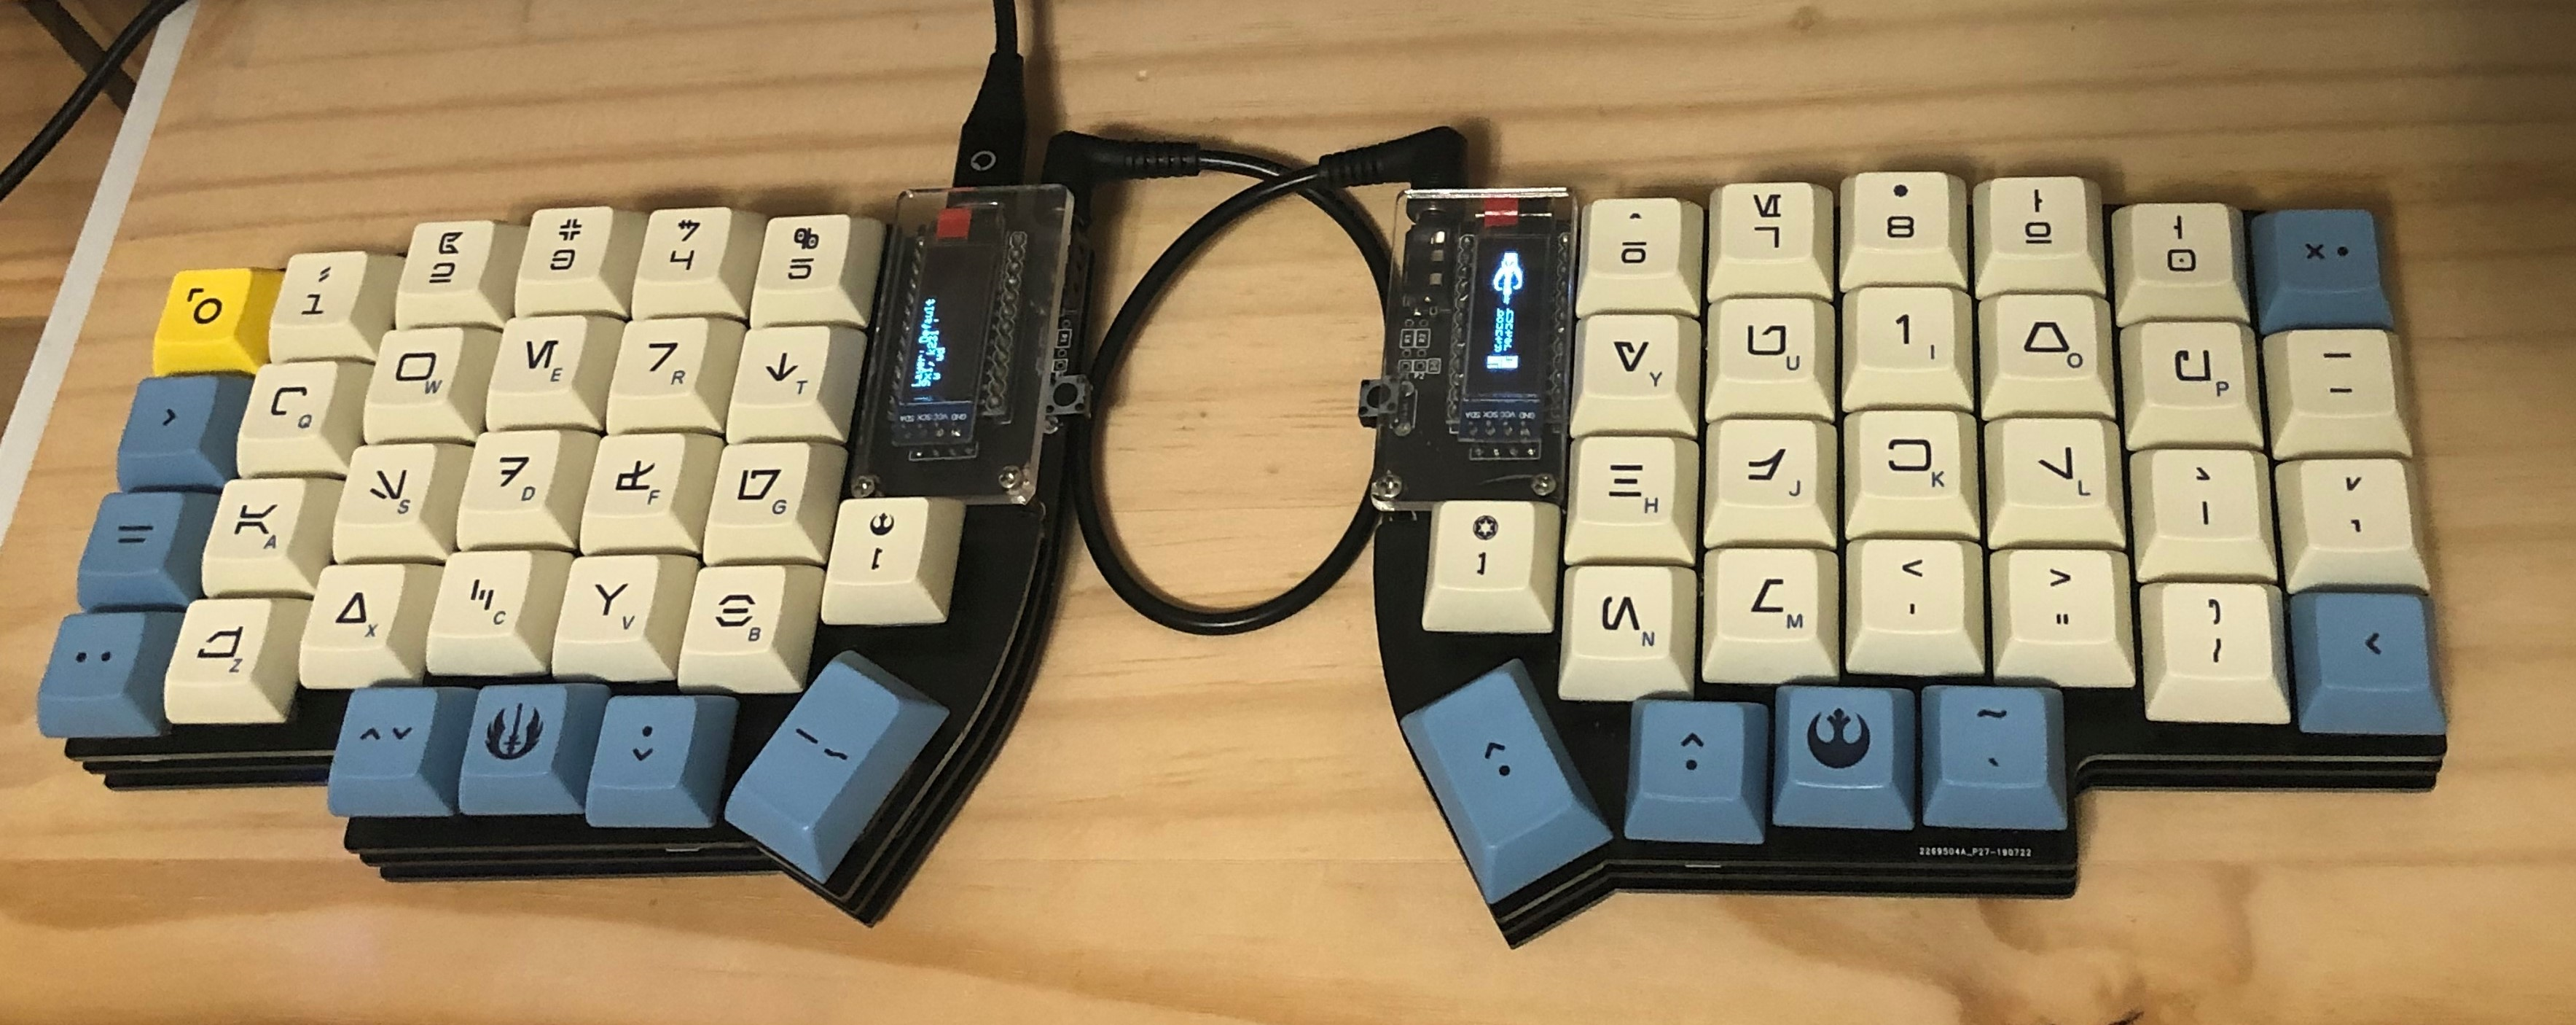
As icing on the cake, I added a magnetic micro-USB connector and 3M rubber feet so the keyboard halves wouldn’t slide all over the place. I also found a budget set of Aurebesh keycaps on Aliexpress to match the Star Wars theme. Here’s the finished product in all its glory.

Some final thoughts:
- Behold, the lights shine wonderfully. But only if you’re typing in a dark cave. Sandwiching RGB LEDs between two black pcb plates doesn’t produce the optimal effect, so the backlighting can’t be seen very easily on this build.
- I started off with Hako Clear switches, but quickly realized that the high actuation force was taxing on the fingers. After switching to Hako Violet switches, the keyboard felt much easier to use.
- Although the ergo keyboard layout is unconventional for those coming from standard keyboards, muscle memory can be acquired fast. The first thing I got used to was the unusual placement of the backspace key under the right thumb, and now I’m tempted to go for it there on regular keyboards as well.
To be honest, I think it looks a little bit like this drone ship from FTL:
